
Transforming a room with a little paint and some salvaged pallet or fence boards is easier than you think. DIY diva Holly Lemoine Raymond shares her secrets.
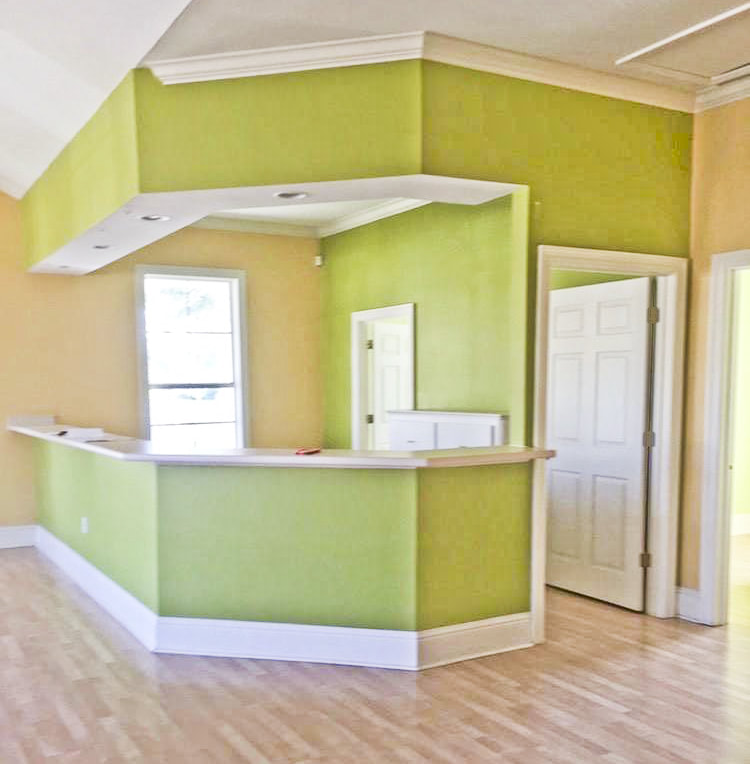
The "before" picture of Holly's office reception area.
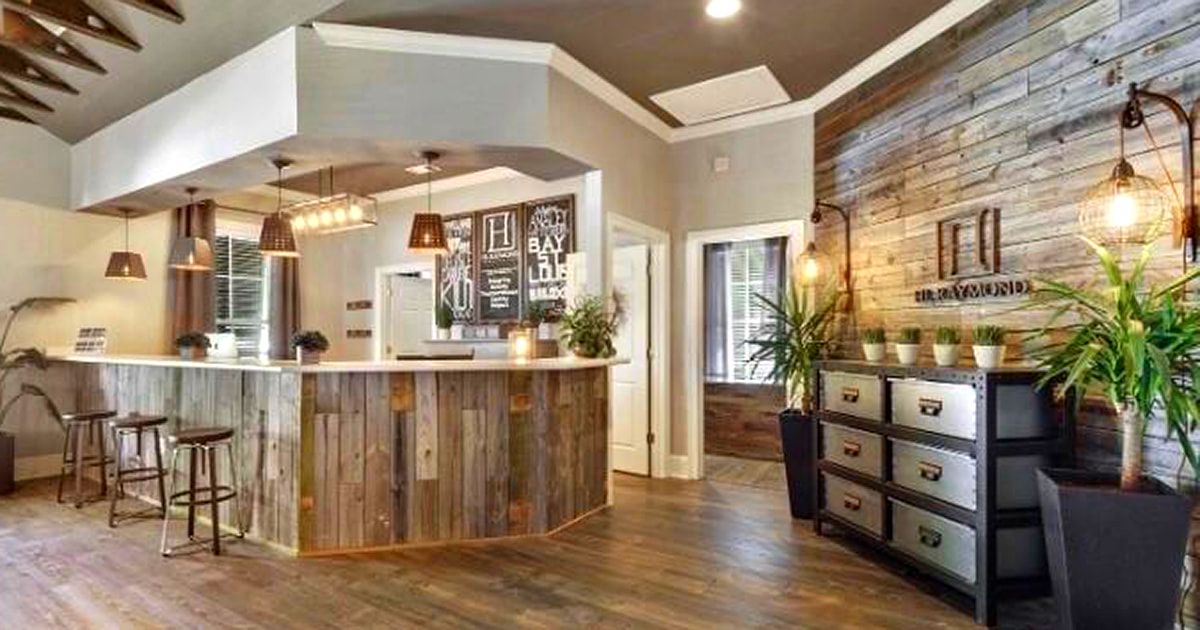
When our clients and visitors come in, one of the first things they notice is the pallet wall with our logo on it. It’s a great focal piece and makes a great conversation starter. When I tell them that using recycled and repurposed wood created the pallet wall, island, and other features around the office they are amazed.
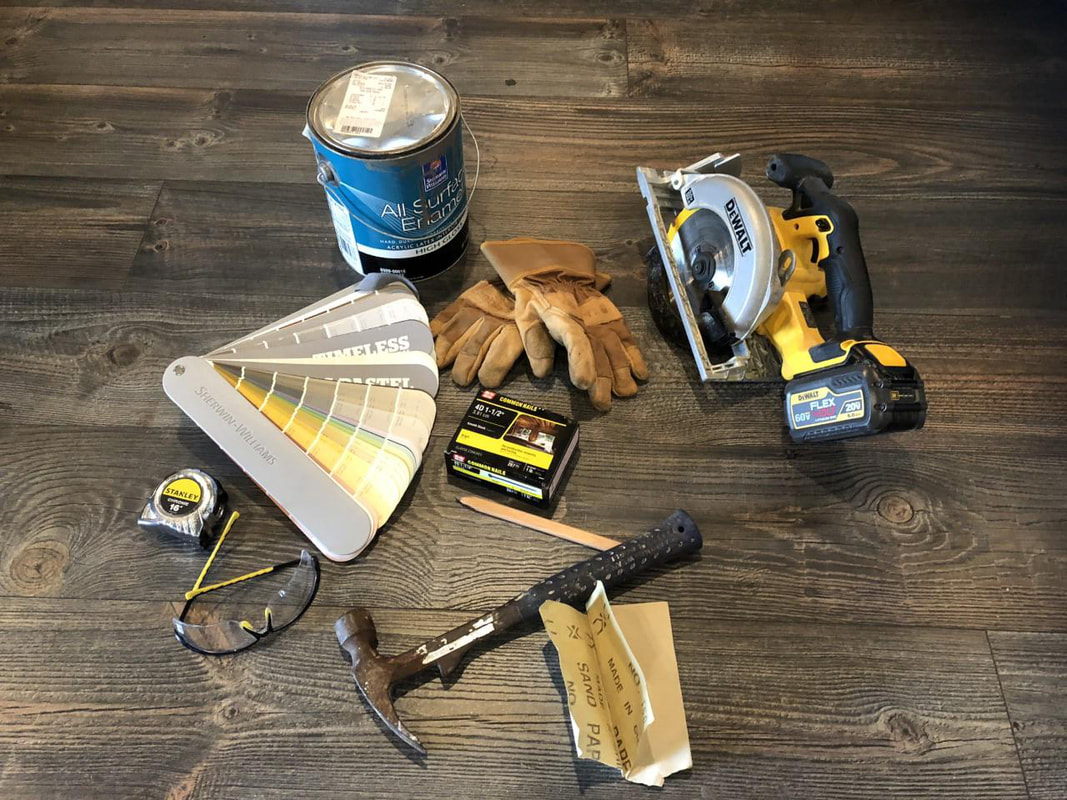
One of my favorite things about recycling wood is that the wood is never perfect. It’s a great reminder that nothing and no one is perfect. I’m an imperfect person who likes to take old, worn out items and turn them in to beautiful things. To make the pallet wall or island you will need the following supplies:
Now that your supplies have been gathered let’s get started!
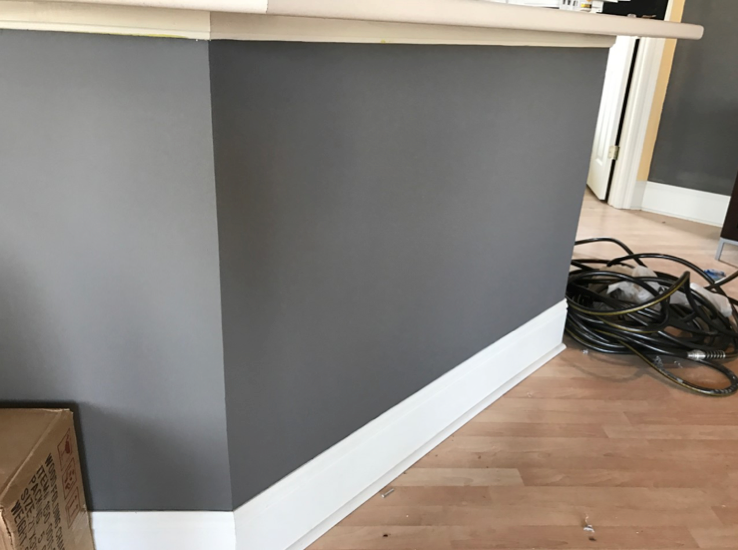
Step 1: Pick the area to be updated and remove any existing trim or outlets. Prep the area by wiping it down and removing any excess dust.
Step 2: Measure the area you will be working with so you can be sure to have enough paint and boards.
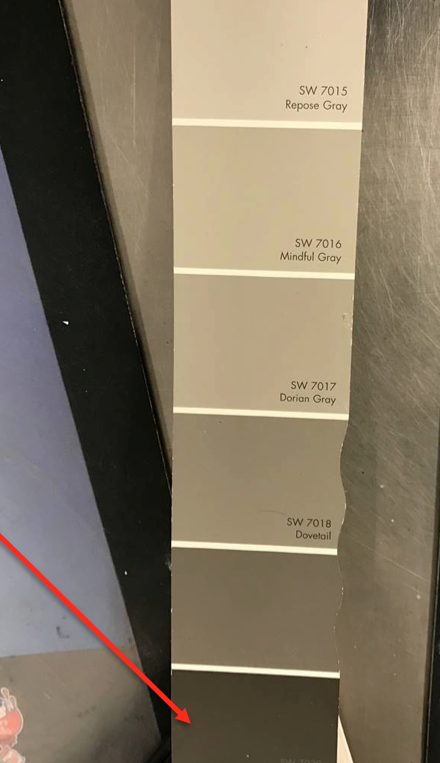
Step 3: Using a dark color, paint the area and allow it to dry. Remember, this does not have to be perfect. The purpose of the paint is to hide the small imperfections of the boards. The color I used was Gauntlet Gray.
Step 4: While your painted area is drying use this time to deconstruct your pallets, deck or fence boards.
Depending on the look you are trying to achieve you can stain or white wash your boards. I prefer to leave the boards in their natural color. This gives more of a rustic or industrial look, which is the style I prefer. 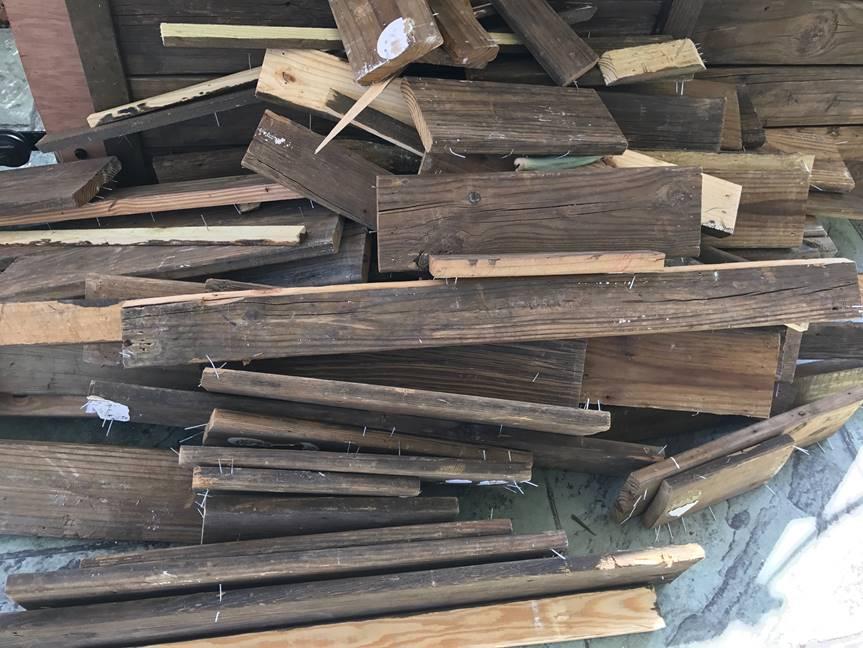
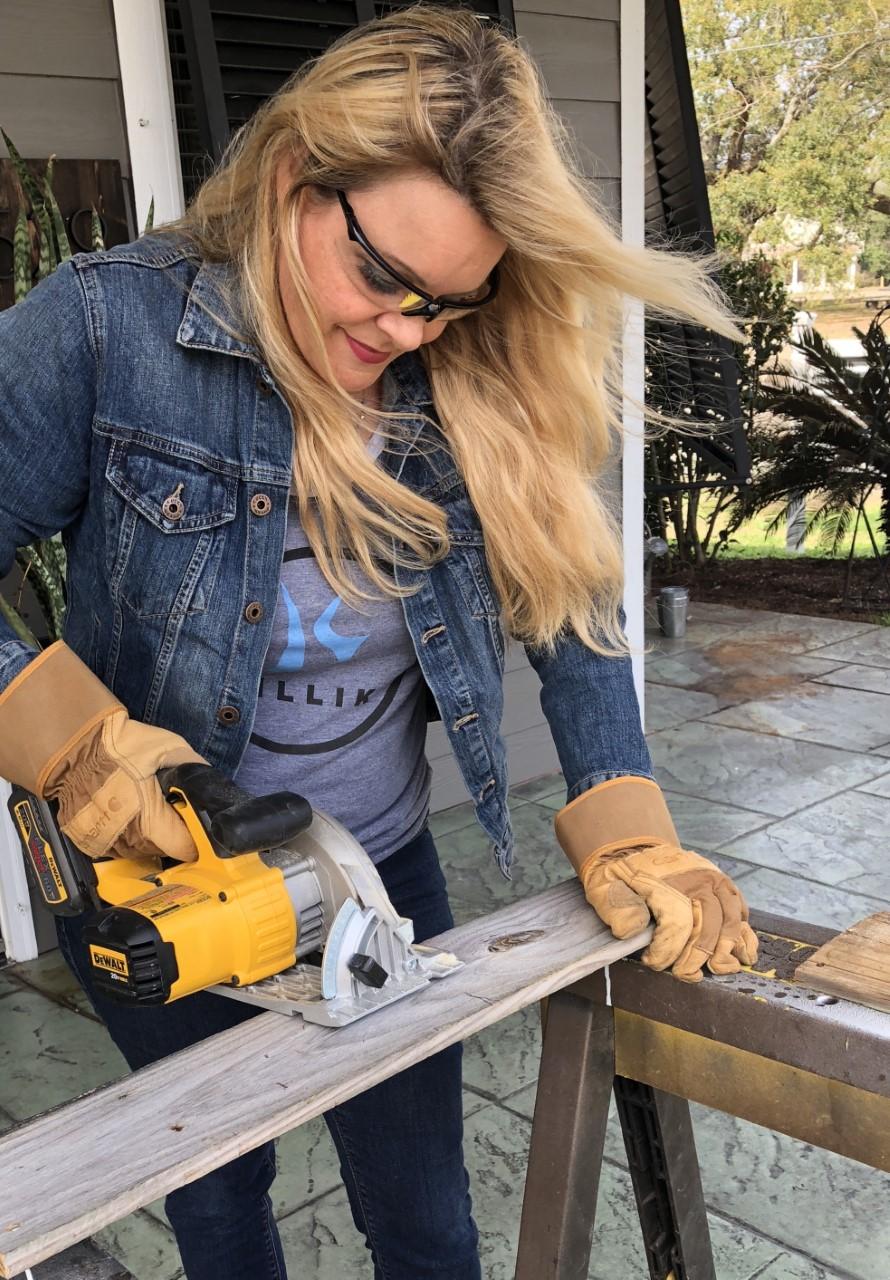
Step 5: Let’s cut our boards down to size! I like cutting the boards in random sizes. Some boards I trim off a little on the end, others I cut in half or three quarters.
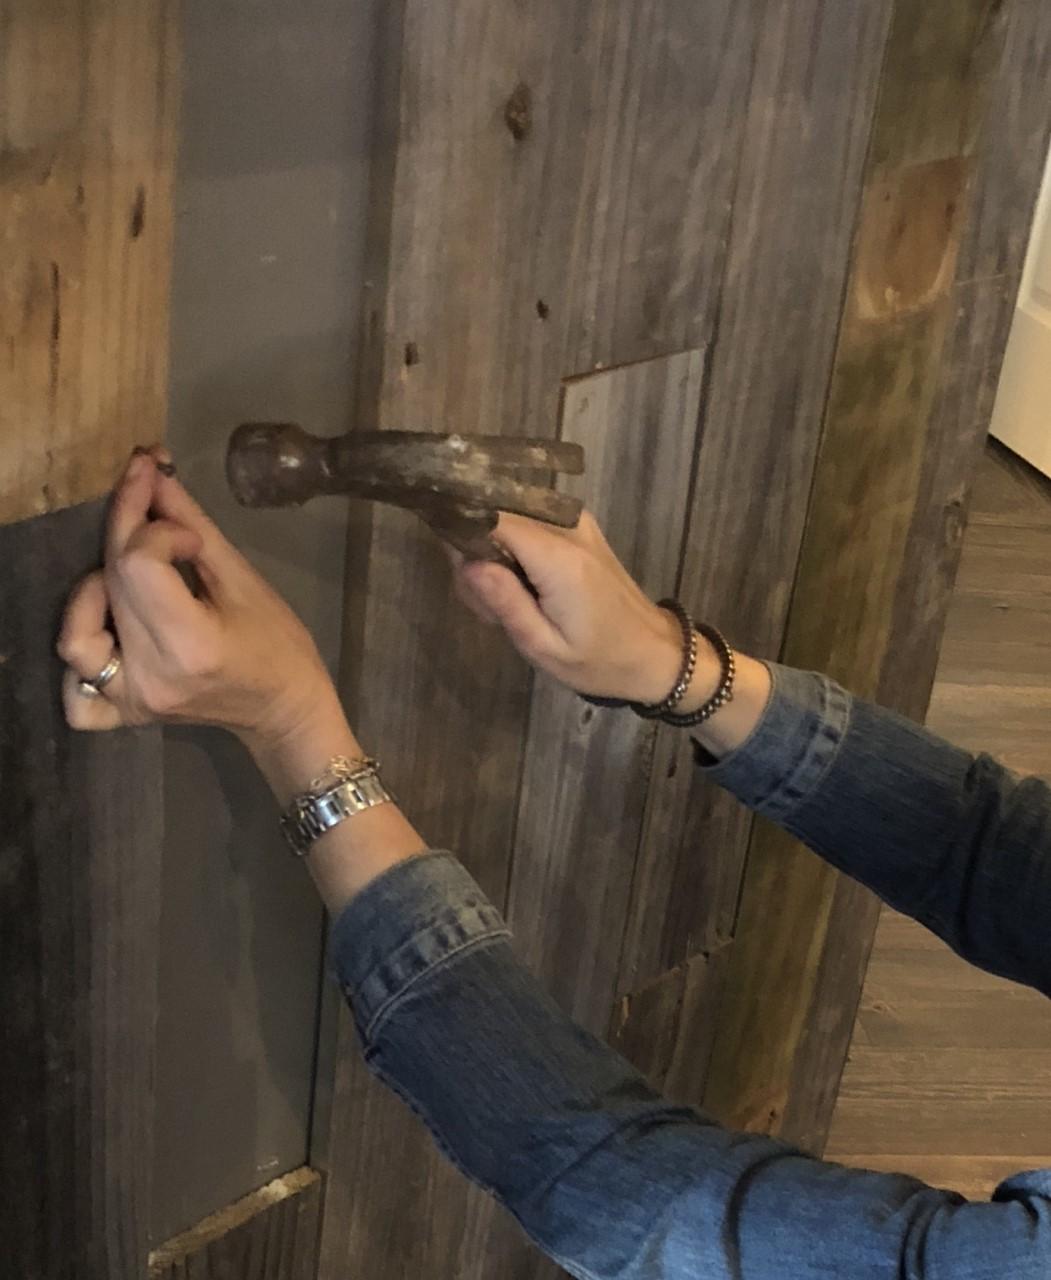
Step 6: Start putting your puzzle together. Stagger your pieces and vary the shades of wood. Again, more imperfect the better! 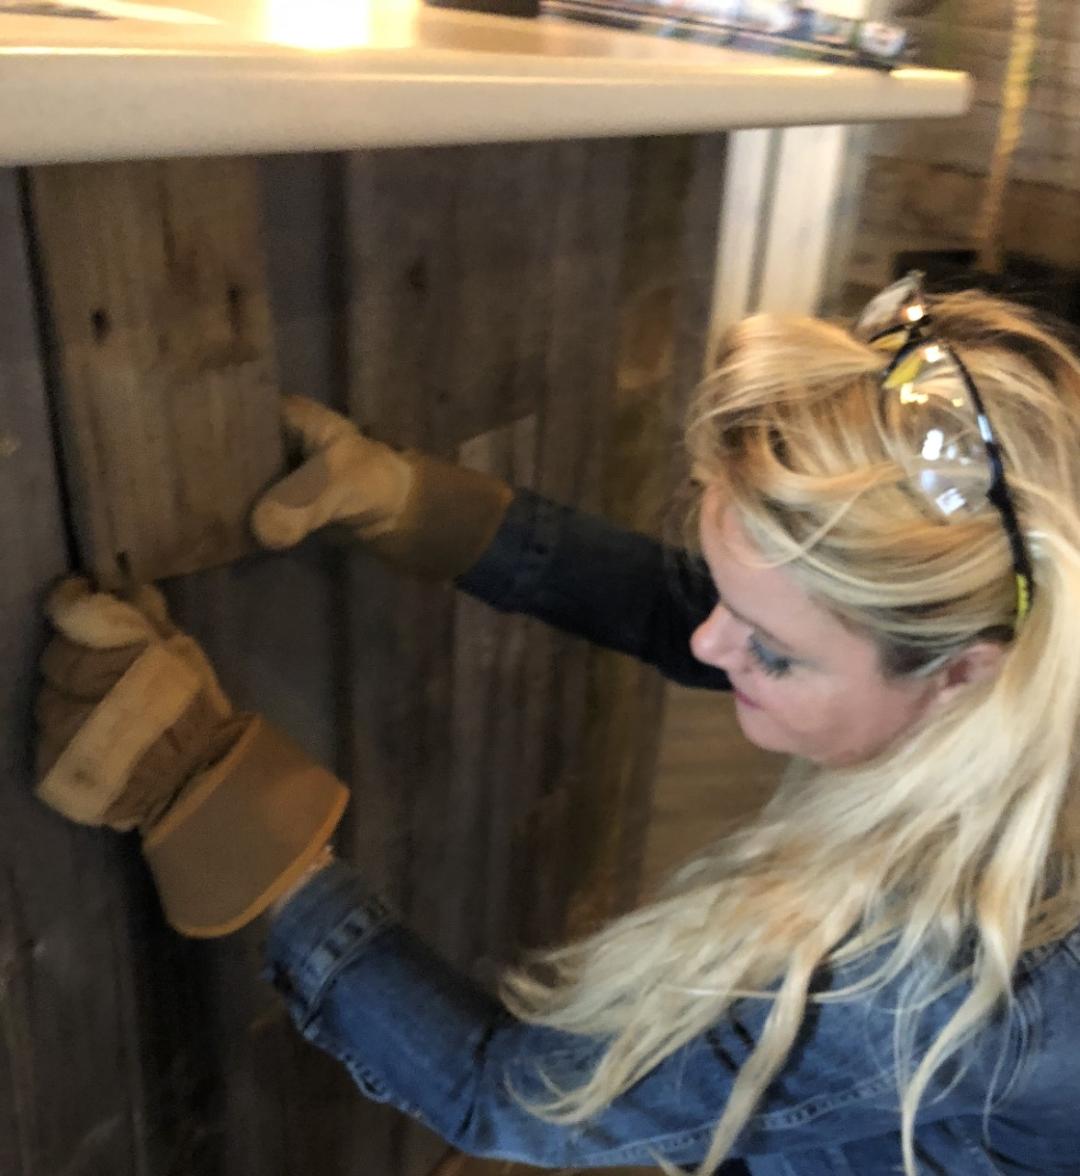
Step 7: Stand back and enjoy the view!
I hope you enjoyed this project. It is fun to bring things new life. If you’d like to see how we used recycled wood in our office, please stop by for a visit. Our team would love to see you and have you sign our chalkboard wall!
Thank you for reading Beautiful Things!
Comments are closed.
|


Categories
All
Archives
July 2024
|


 RSS Feed
Shoofly Magazine Partners
Our Shoofly Partners are local businesses and organizations who share our mission to enrich community life in Bay St. Louis, Waveland, Diamondhead and Pass Christian. These are limited in number to maximize visibility. Email us now to become a Shoofly Partner!
|
|

|
|
|
|
|

|
|

|
|
|

|
|
|
|
|

|
|
|
|
|
|
|
|
|

|
|
|
|

|