
Break out the elbow grease and hang with DIY Diva Holly Lemoine-Raymond as she shows how to make this very cool desk from a shutter.
Here’s what you’ll need:
Step One:
Measure the space where the desk will be permanently installed. It can be in a nook, a shed, or a space with three walls.
Step Two:
Obtain a shutter. I used one I got from a friend of mine who has a house on the beach. I knew I could bring new life to it.
Step Three:
Measure, mark, and cut the shutter using the circular saw. 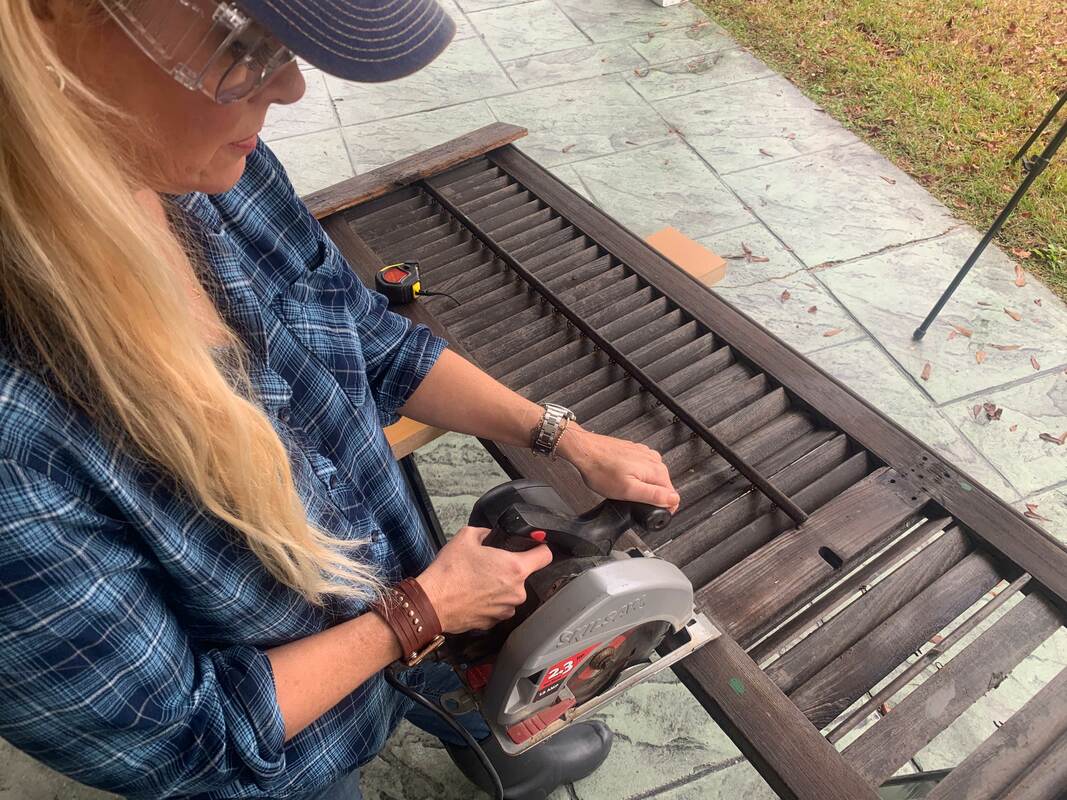
Step Four:
Clean and sand the shutter. This will be the time you could paint or stain the shutter. I left mine natural because I liked the look it gave to the She-Shed. While you have your paint or stain handy, you may want to paint the bracket/corbels to prepare them for a step later. 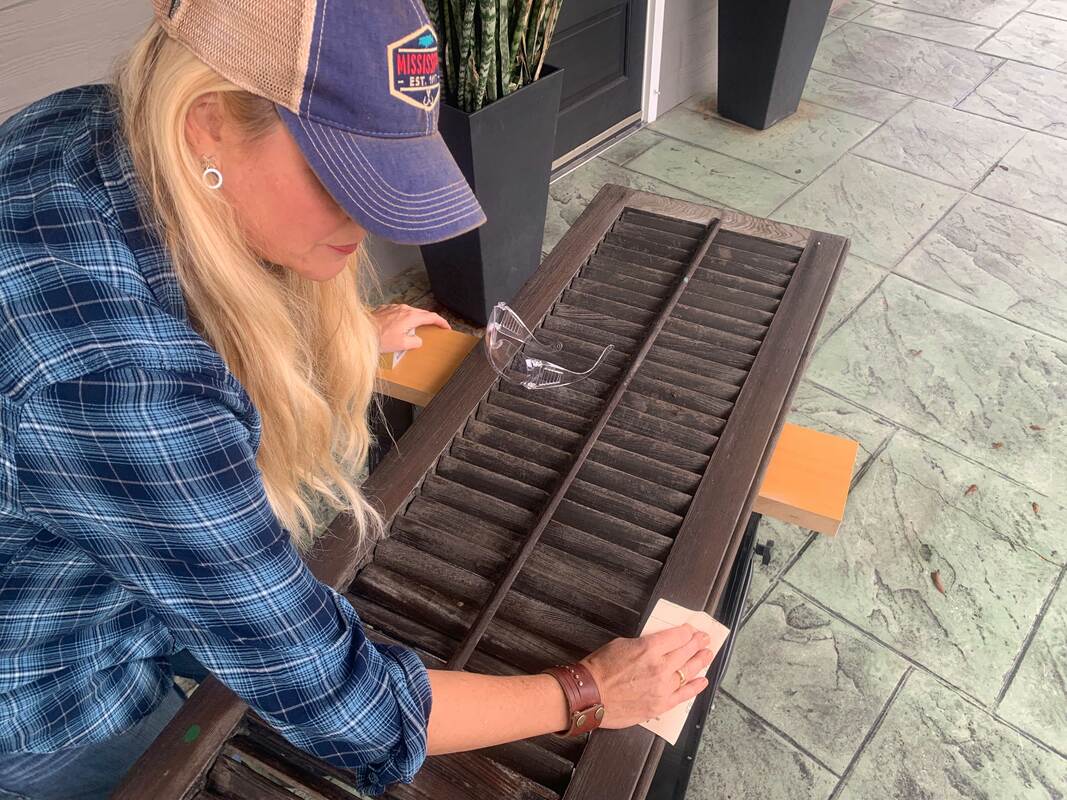
Step Five:
Obtain the glass or Plexiglas to place on top of the desk. Since you’ve already measured the shutter for proper size, you will not have to measure.
Step Six:
Use the wire cutters to remove the handle/lever that opens and close the shutters (Some may not have one). 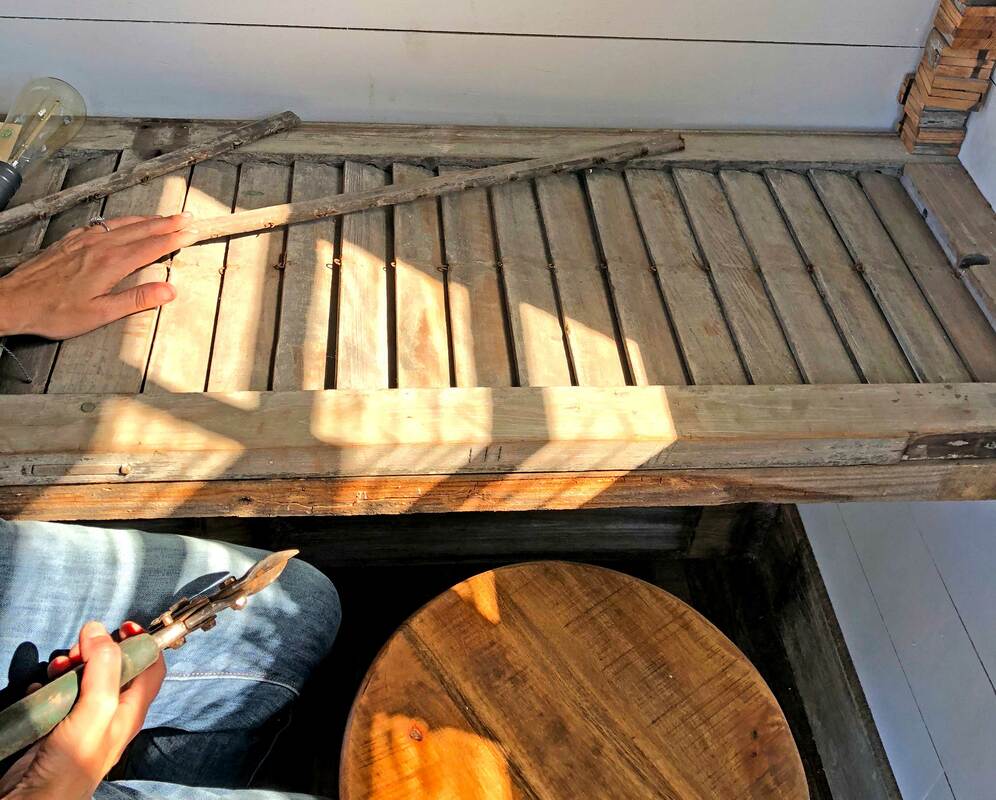
Step Seven:
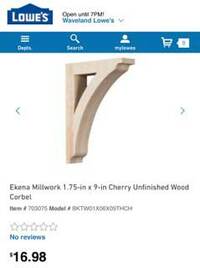
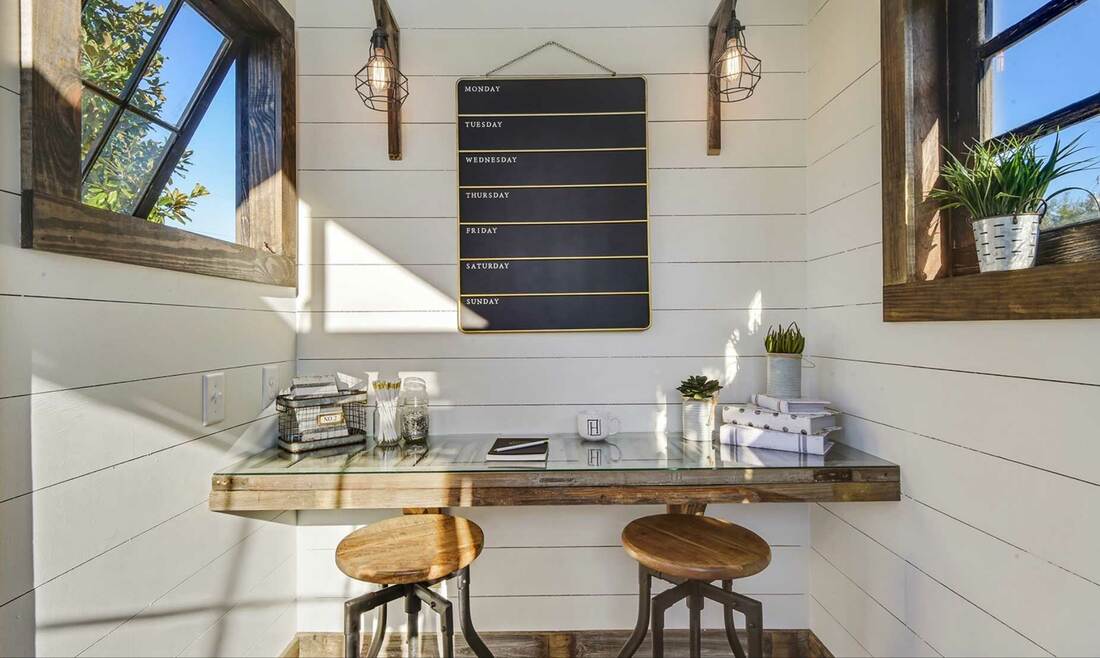
Find the studs in the wall then secure the bracket/corbel to the wall. The normal height of a desk is 28 to 30 inches. Be sure to measure the wall for proper placement of the bracket/corbel. 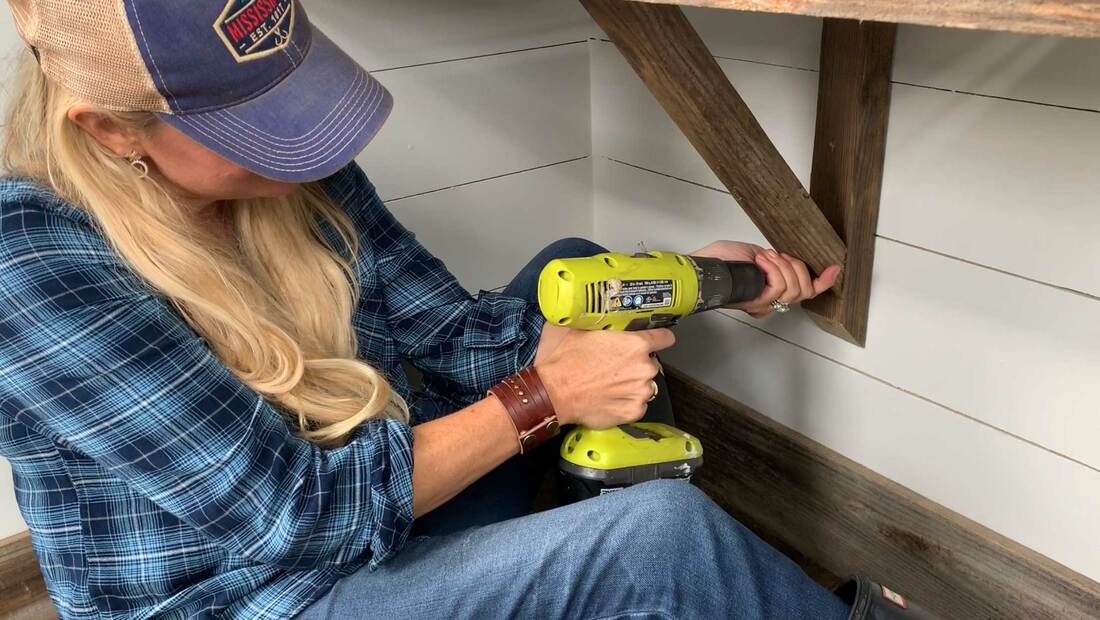
Step Eight:
If you’d like to make the desk look a bit thicker, you can add fence boards to the front side of the shutter. 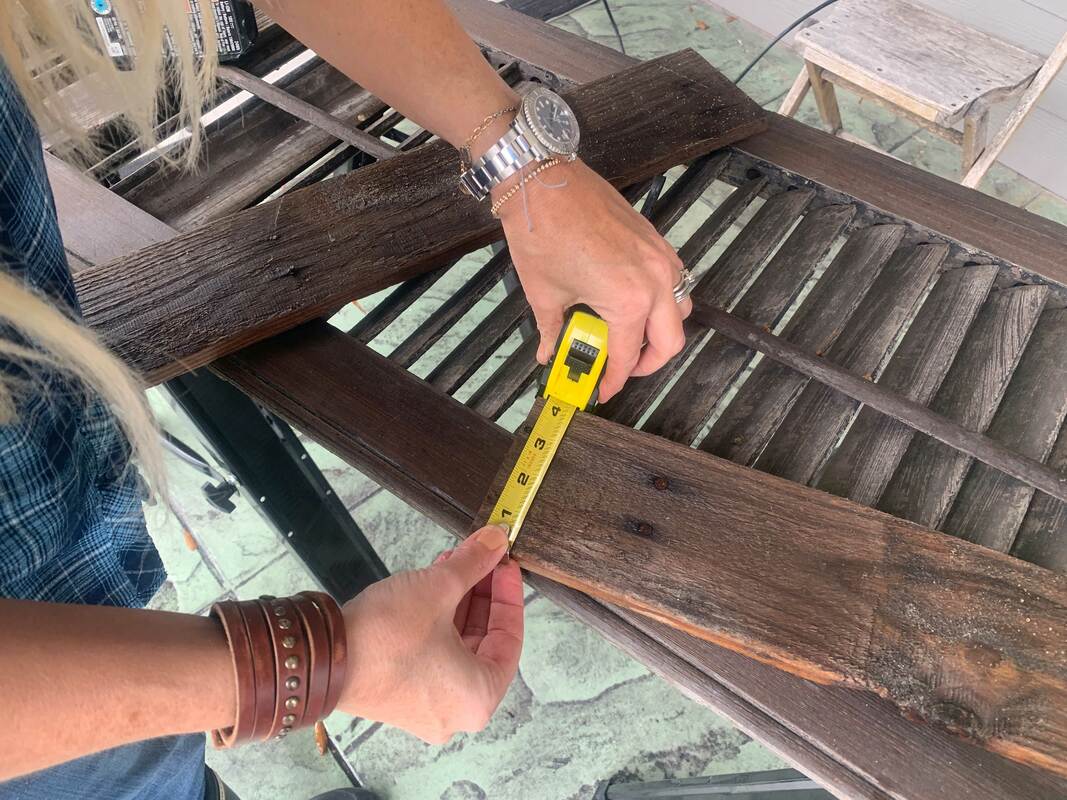
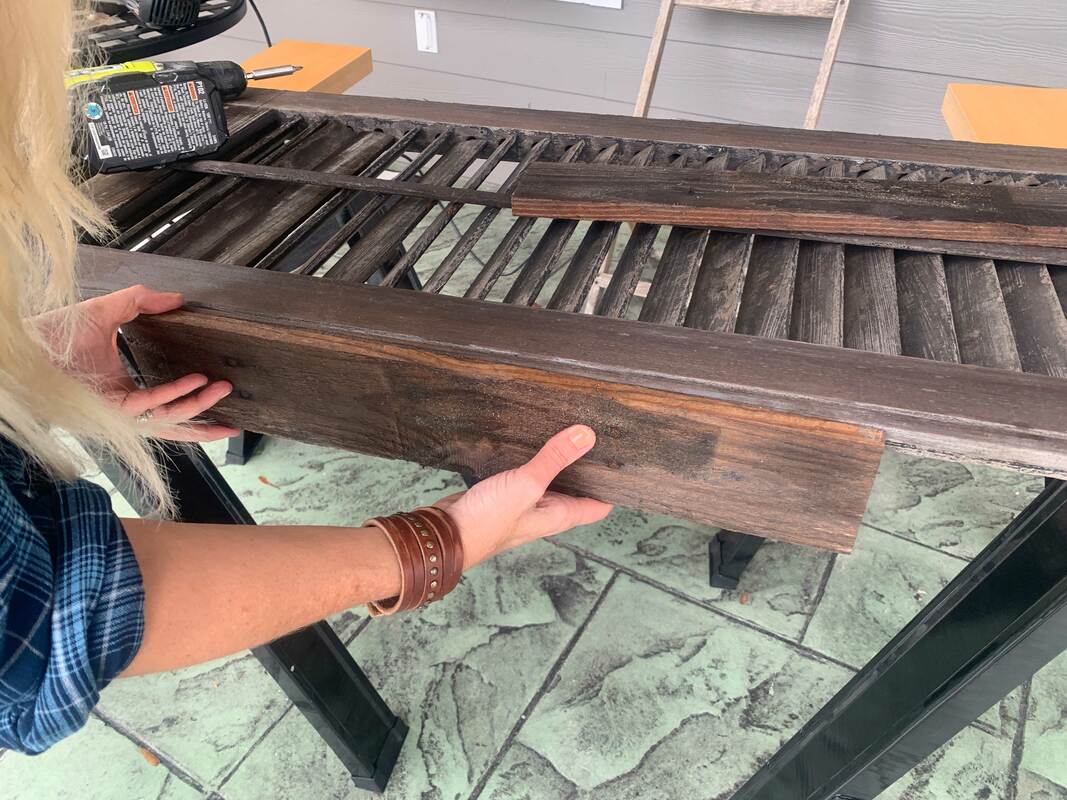
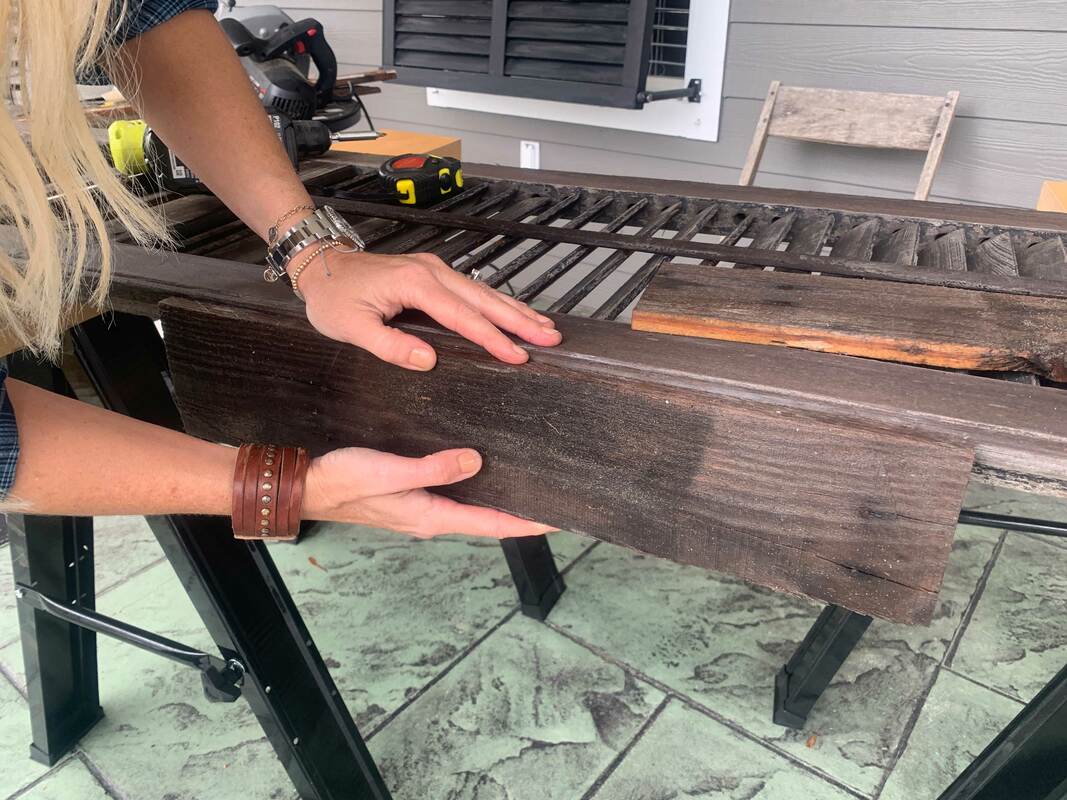
Step Nine:
Place the shutter on top of the bracket/corbel. For extra support we added screws under the desk into the wall as well.
Step Ten:
Add glass/Plexiglas
Step Eleven:
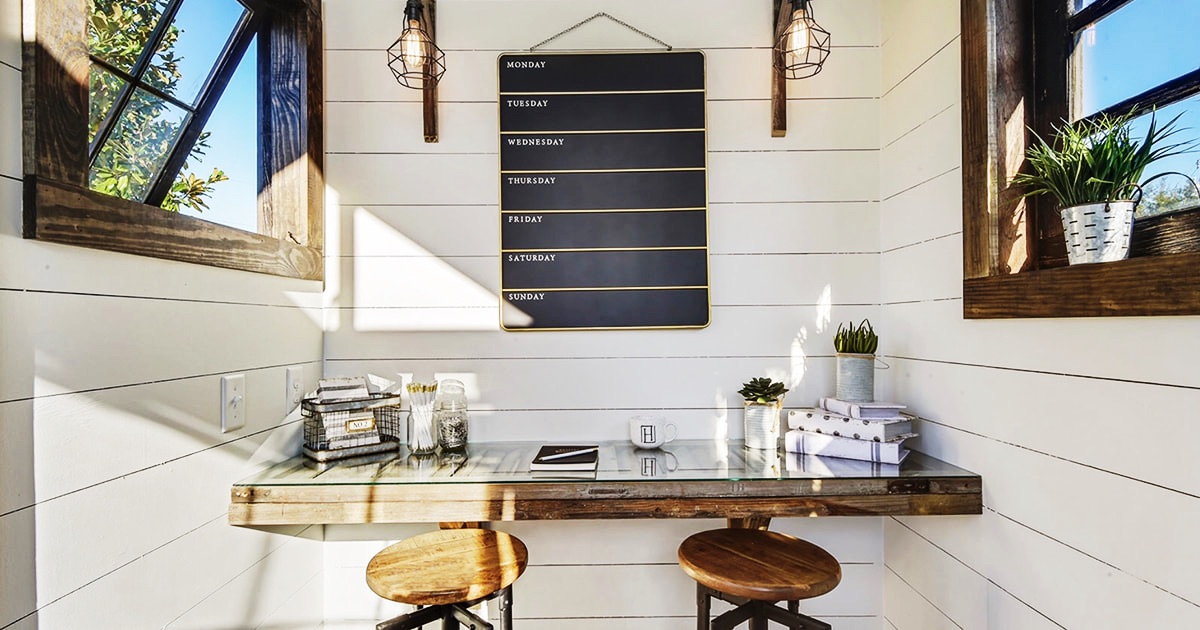
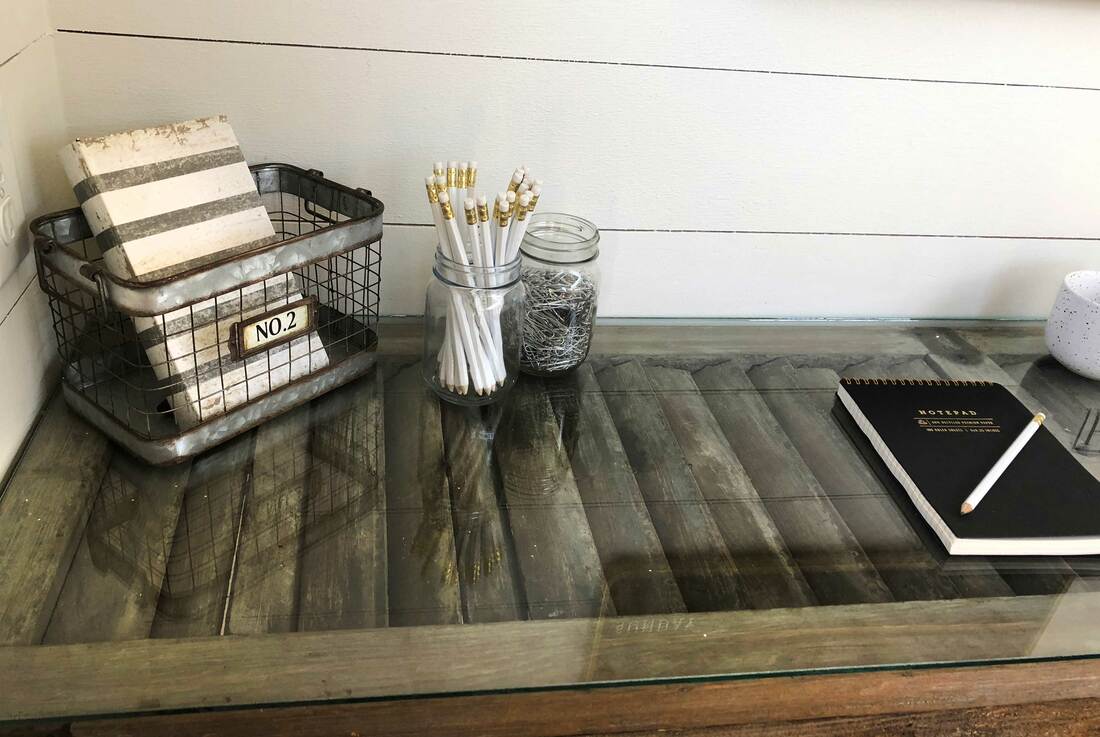
Embellish with appropriate desk items and a comfy seat. Time to get to work and enjoy your new desk! Thanks again for checking out Beautiful Things. 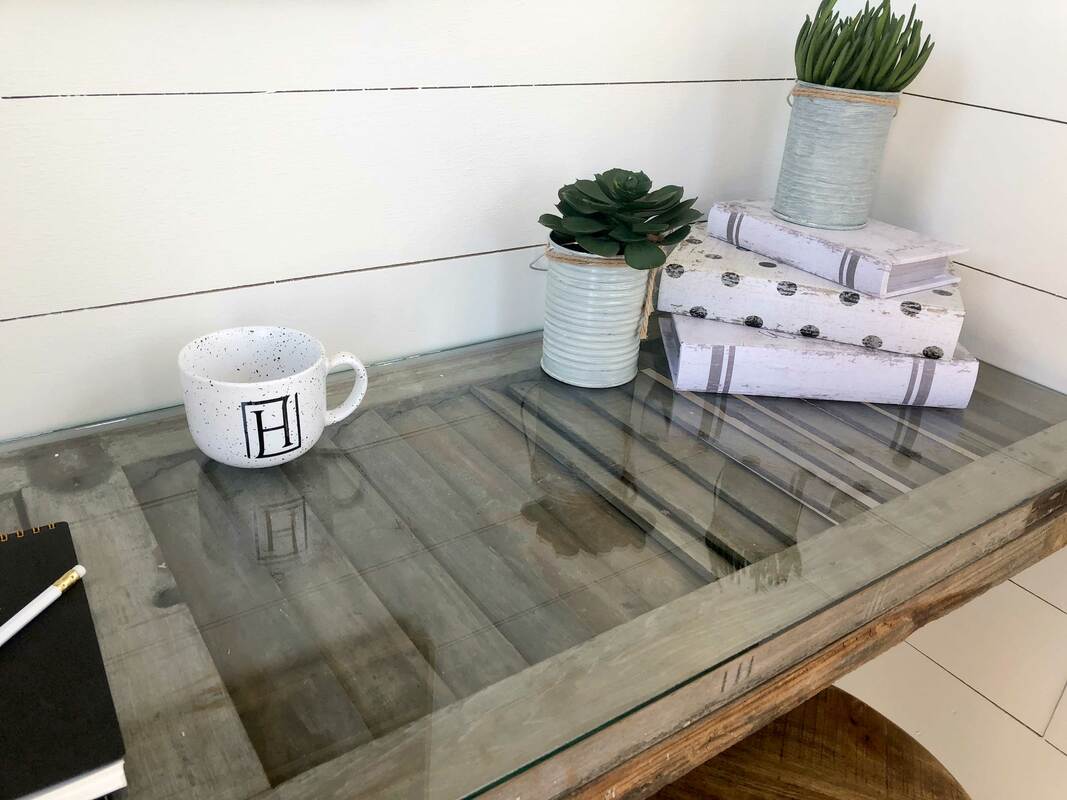
Comments are closed.
|


Categories
All
Archives
July 2024
|
 RSS Feed
Shoofly Magazine Partners
Our Shoofly Partners are local businesses and organizations who share our mission to enrich community life in Bay St. Louis, Waveland, Diamondhead and Pass Christian. These are limited in number to maximize visibility. Email us now to become a Shoofly Partner!
|
|

|
|
|
|
|

|
|

|
|
|

|
|
|
|
|

|
|
|
|
|
|
|
|
|

|
|
|
|

|